

So you’re ready to turn that old mulched garden into a lawn and wondering what’s the best way to get this done. The first thing you should do is assess your goals and determine how much work there is you will need to do. Landscaping mulch is a lot of hands-on hard-working labor, do not forget that.
Here is how you can remove mulch and replace it with grass:
You can use a rake to remove mulch before reseeding. If the mulch is untreated natural fibre and there’s no landscape fabric, then you can use a rototiller to mix it into the soil instead. Once removed, grade, core aerate, add topsoil, and add compost and amendments as needed before seeding or putting down sod.
How to Remove Mulch and Replace with Grass
This is just a brief overview of how to remove mulch and grow a lawn. For much more detail, I suggest reading The Organic Lawn Care Manual: A Natural Low-Maintenance System For A Beautiful, Safe Lawn by Paul Tukey, which goes step-by-step through creating the hassle-free organic lawn of your dreams.
Step 1: Decide on your goals for the area.
Before you do anything, know what you want out of the mulched area. What do you plan to do there? Why do you want to remove the mulch and put in a lawn?
Taking time to reflect on why you want to do this will ensure you make the right decisions throughout this process, so you end up with what you want, and not something that you’ll have to tear back out again.
For example, maybe you bought a new house with a big ornamental garden covered in mulch, but you don’t want to spend your weekends gardening or pulling weeds from an abandoned garden. Instead of spending your weekends nurturing a time-consuming lawn, you’d rather hire a lawn care company to install a lawn alternative that you don’t need to mow at all.
Or perhaps you need to add more space for your rambunctious kids to run around on. In that case, you’ll want to pick a hardy grass that can stand up to a ton of footfall or gravel.
Step 2: Assess the area and the soil
Once you know what you want, you need to assess what you already have and figure out if it’s possible, and if so, what you need to do to achieve it. Trying to grow a record-breaking green lawn underneath heavy shade is just going to end up with a patchy lawn and you tearing out your hair.
A few things you’ll want to assess include:
- How deep is the soil beneath the mulch? Is the soil compacted or loose? Is there landscape fabric underneath the mulch or tree roots growing through the soil?
- What is the pH and nutrient profile of the soil? Will you need to further amend the soil? (To determine this, get a soil test from your local university extension office.)
- What type of mulch is it? Is it natural, untreated mulch able to biodegrade in the soil or a synthetic or treated mulch (dyed mulch)?
- How even is the ground underneath? How much grading will it need?
- How much sunlight does the area get? How much rain? Does the area drain well or is this the spot where all the rain that lands in your yard sits?
- Are you willing and able to do all the work that’s needed, or would you be better off hiring a lawn care company?
Step 3: Remove the Mulch and Any Ornamentals
If the mulched area contains plants, dig them up. You can move them someplace else or pot them up to give away on Kijiji or Craiglist.
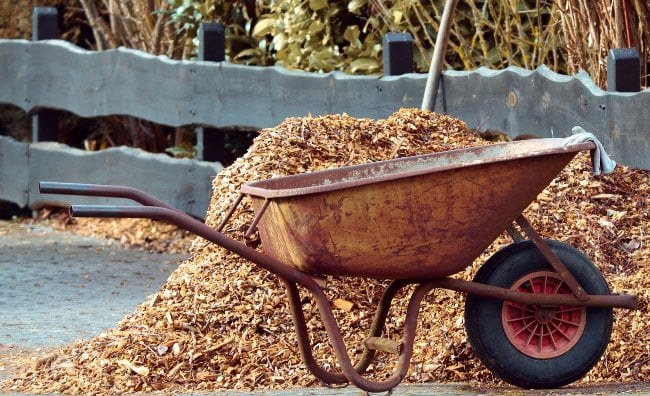
Rake, Shovel & Wheelbarrow
The simplest and cheapest way to remove mulch is to use a rake and a wheelbarrow. Rake up the mulch into piles and shovel them in a wheelbarrow.
If you have a lot of mulch to remove, you may want to invest in a 16-tine bedding fork. Bedding forks are designed for mucking out horse stalls of hay and wood shavings, so you can both easily rake the mulch into piles and then use the rake like a shovel. Any pieces small enough to get through the tines will quickly break down (provided that the mulch is a natural organic matter like wood chips).
If the mulch is a natural, vegetative matter like woodchips, then you don’t need to get rid of it all. Just enough of the top layer to allow new grass to reach the soil. A layer under 1-inch will work. After shoveling most of the mulch away, use the back of a metal rake to even out the surface.
If the mulch is dyed or a synthetic like rubber, then make sure that you get rid of it all, or it’s going to be in your lawn for years to come.
Rototiller

There is one other option: the rototiller. So long as you don’t have landscape fabric underneath the mulch and your mulch is a natural, untreated organic matter like wood chips, then you can just run a rototiller to work the mulch into the soil. The mulch will biodegrade much quicker that way.
Wood chips will tie up nitrogen as part of its degrading process, so add a nitrogen addendum like blood meal or cotton meal or a 2-inch layer of compost so that the soil has enough nitrogen to support your grass.
After rototilling, even out the disturbed earth with the back of a metal rake.
Once you’ve removed the natural mulch, you can either compost it or put in your yard waste bin. You will need to take Synthetic and dyed mulches to a waste management facility. [Learn more in our guide of disposing of mulch]
If there’s landscape fabric beneath the mulch, pull that up too. Landscape fabric isn’t an effective long-term solution for preventing weeds, as once you grow on top of it, weeds will just sprout on the soil layer above it. And you can’t start a new lawn from seed without access to the soil.
Step 4: Grade the surface and relieve compaction
Depending on how even the surface already is, you may need to do a little patching up with a layer of topsoil or compost or a lot of grading work.
If the soil is compacted, then run a core aerator over the area. The core aerator will pull out core samples that will give the soil more room to expand. If it’s severely compacted, you may want to run a rototiller over it.
Finally, use a landscape or metal rake to even out the topsoil so you have a smooth surface to sow. Break up any clumps bigger than a quarter.
Step 5: Add any additional topsoil, compost or other amendments
Based on how deep your soil is, the nutrient profile, and what you did the previous step, you may want to add topsoil, compost or other amendments to give your grass what it needs to thrive for years to come. Grass does better when it has at least 6-inches of topsoil to grow roots through, as deep roots mean it needs fewer waterings and the grass will better survive heat waves and other stresses.
Step 6: Sow or sod the lawn
The last step is to seed or sod the lawn. The best seed depends on the amount of shade, foot traffic, and maintenance you want to do. More people are switching to native grasses or no-mow alternatives as they need way less care than more popular kinds of turf.
After sowing, you’ll need to keep the area moist as the seeds germinate and seedlings grow.
Alternative: Hire a landscaping/lawn care company
Removing mulch and starting a new grass lawn takes a lot of time and labor, especially if you have weeds and ornamental plants or shrubs among the mulch. You’ll save time and effort by hiring a lawn care company. They already have expensive equipment that will make the process go quickly and the expertise to put in the new lawn right.
And when a lawn is installed correctly from the get-go, it’ll be much easier to take care of for years to come.
A lawn care company usually charges around $1000 for a job like this, although it’ll depend on the size of the area and how much grading they need to do.
Just Remember:
Know what you want and why you want it before you start. Depending on how big the mulched area is, you may have a big, laborious job on hand. Make sure it’s worth it.

Jamie is the founder of The Backyard Pros. When he was 15 years old he started working at a garden centre helping people buy plants, gardening products, and lawn care products. He has real estate experience and he is a home owner. Jamie loves backyard projects, refinishing furniture, and enjoys sharing his knowledge online.